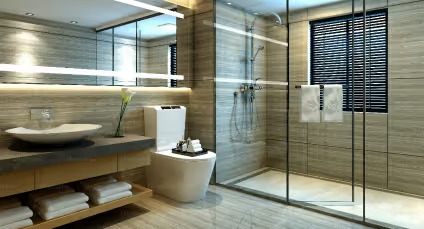
Walk-in Shower for Arthritis: Features That Ease Pain
Table of Contents
- Why a Walk-in Shower Matters for Arthritis
- Walk-in Shower Safety Features That Protect Joints
- Easy-to-Use Shower Controls That Work With Stiff Hands
- Shower Seat for Arthritis: Seated Showering Options
- Grab Bars and Handrails for Stability and Support
- Walk-in Shower vs. Walk-in Tub: Which Is Better for Arthritis
- Planning Your Arthritis-Friendly Walk-in Shower
- Frequently Asked Questions
Last Updated: October 11, 2026
Why a Walk-in Shower Matters for Arthritis
A walk in shower for arthritis eliminates painful movements like stepping over high tub rims, gripping slippery surfaces, or twisting to reach controls. Instead, you step directly into a spacious, accessible shower.
Arthritis pain stems from repetitive strain, unstable footing, and awkward reaching. A walk-in shower designed with arthritis in mind removes these triggers: low-threshold entry eliminates high steps, grab bars at elbow height provide support without tight gripping, and easy-to-use controls adjust temperature and water pressure without wrist rotation.
A walk-in shower restores independence, you shower without fear of falling and don't need help balancing or reaching.
Walk-in Shower Safety Features That Protect Joints
Safety features reduce joint strain that triggers pain flare-ups, allowing comfortable daily showering without aggravating arthritis.

Low-Threshold and Curbless Entry
A low-threshold or curbless entry is the foundation of an arthritis-friendly shower. Many people with arthritis can't lift their leg high enough to clear a standard 5-7 inch tub rim without pain. A curbless entry eliminates this problem entirely.
The threshold should slope gently toward a drain (less than one-quarter inch rise) to prevent water pooling while keeping entry accessible. All County One Day Bath uses high-tech polymer materials that create seamless, waterproof transitions.
Non-Slip Flooring and Fall Prevention
Non-slip flooring is essential for people with arthritis who may have reduced balance. Look for textured surfaces that provide grip without irritating skin.
Choose matte finishes over glossy tile. Specialized polymer flooring stays slip-resistant when wet.
Easy-to-Use Shower Controls That Work With Stiff Hands
Arthritis limits grip strength, wrist rotation, and shoulder reach. Standard dual-knob faucets trigger pain; the right controls eliminate these painful motions.
Lever-Handle Faucets vs. Knob Controls
Lever handles require only a downward or sideways push, not a twisting grip. A single-lever design controls both temperature and flow with one motion. The lever should be at least 7-8 inches long so you can operate it with your palm, forearm, or elbow if hand strength is limited.
Thermostatic Mixing Valves
A thermostatic valve maintains water temperature automatically, preventing sudden surges and eliminating repetitive wrist and finger strain from micro-adjustments.
Control Placement and Reach Zones
Wall-mounted controls should be positioned 38-48 inches from the floor, within reach whether standing or seated. Place controls on the same wall as your entry point so you can reach them without crossing the wet floor.
Test controls before installation to ensure you can operate them with one hand using simple push-pull motion, not wrist twisting.
Handheld Showerheads with Ergonomic Handles
A handheld showerhead lets you direct water without holding your arm in a fixed position, reducing shoulder and elbow fatigue. The handle should have a textured, non-slip grip at least 1.5 inches in diameter with a slight curve. A lightweight showerhead (under 1 pound) reduces arm strain.
Mount the handheld on a slide bar at 60-66 inches high for standing or seated use. Use a simple lever diverter valve, not a twist knob.
Volume and Flow Control
A pressure-balancing valve maintains consistent water pressure, preventing sudden surges that startle or cause loss of balance.
Shower Seat for Arthritis: Seated Showering Options
Standing for a full shower exhausts joints and compounds pain in knees, hips, ankles, and lower back. A built-in shower seat reduces joint load and fatigue, especially during transfers, sitting down and standing back up.
Why Seated Showering Matters for Arthritis
A shower seat removes the continuous load on knees, hips, and ankles, allowing you to shower without fatigue or pain flare-ups. Seated showering also improves safety: you're lower to the ground if you lose balance and have both hands free to wash.
Seat Height and Positioning
The ideal seat height is 17-19 inches from the floor, allowing feet to rest flat. This is critical: dangling feet increase hip and lower back strain and reduce transfer stability. Adjust height if you're shorter or taller than average or have limited hip or knee mobility.
Position the seat 12-18 inches from the shower wall to allow side or front approach without awkward twisting or reaching.
Seat Design and Materials
A built-in seat is far superior to removable stools, which can shift, tip, or slide on wet floors. Built-in seats are anchored and won't move.
The seat should slope slightly (about 5 degrees) toward the drain. Use non-porous materials like high-tech polymer, which resist mold, clean easily with soap and water, and stay warmer than ceramic tile.
The seat should be at least 16 inches deep (front to back) so you can sit comfortably without perching on the edge. A wider seat (18-20 inches) is better if your bathroom space allows, as it gives you room to shift position and reduces the feeling of being cramped.
Armrests and Transfer Support
Armrests or grab bars flanking the seat are essential for safe transfers. These bars should be positioned 8-10 inches to either side of the seat, at a height of 24-28 inches from the floor. This positioning lets you grip the bars with your arms at a comfortable angle, not too high (which strains shoulders) and not too low (which requires bending).
When you sit down, you can lower yourself using the armrests, reducing the load on your knees and hips. When you stand up, you can push yourself up using the armrests, which is far easier than trying to stand from a seat without support.
Assessing Your Seating Needs
Before installing a seat, consider how you'll use it. Will you sit for your entire shower, or only part of it? Some people sit while washing their lower body and stand for their upper body. Others sit throughout. If you plan to alternate between sitting and standing, make sure grab bars are positioned to support both activities safely.
If you have very limited mobility or severe pain, a seat with a backrest provides additional support and stability. A backrest lets you lean back slightly, reducing the muscular effort required to stay upright. However, backrests can make it harder to wash your back, so they're not ideal for everyone.
Transfer Technique and Pain Management
To sit down safely: approach the seat from the side, grip the armrest with one hand, and lower yourself slowly using your leg muscles and the armrest for support. Avoid plopping down suddenly, which jars your joints. To stand up: grip both armrests, lean slightly forward, and push yourself up using your legs and arms together.
If you live alone and are concerned about falling or getting stuck on the seat, consider installing a grab bar directly behind the seat as well. This gives you a third point of contact and increases confidence during transfers.
Grab Bars and Handrails for Stability and Support
Grab bars are safety features and pain-management tools. They reduce the force your joints must bear during transitions and provide stability when balance is uncertain. The placement and style matter enormously.
Bars should be positioned at multiple heights: one at elbow height for general support, one higher for pulling yourself up from a seated position, and one lower for balance while standing. Horizontal bars work better than angled ones for most movements. Bars should be 1.25 to 1.5 inches in diameter, large enough to grip without requiring excessive hand strength, but not so large that your hand can't close around it.
Install bars into wall studs, not just into tile or drywall. They need to support your full body weight during a fall. The finish should be non-slip, even when wet.
Walk-in Shower vs. Walk-in Tub: Which Is Better for Arthritis
Both options improve accessibility, but they serve different needs. A walk-in shower is faster, easier to enter and exit, and better for daily use. A walk-in tub provides therapeutic warmth that can ease arthritis pain, but it requires more time and physical effort to enter and exit.
For most people with arthritis, a walk-in shower is the better primary choice. You can shower quickly without standing for extended periods if you use a seat. The entry and exit are simpler, reducing joint strain. Water therapy happens during the shower itself.
A walk-in tub makes sense if soaking is medically recommended or if you prefer the therapeutic benefit of warm water immersion. All County One Day Bath can help you decide based on your specific needs and bathroom layout.
Planning Your Arthritis-Friendly Walk-in Shower
Designing a walk-in shower that works for arthritis requires thinking through every detail. Start by assessing your current limitations. Can you stand for long periods? Do you need a seat? How much hand strength do you have? What movements cause the most pain?
Key Dimensions and Accessibility Measurements
A functional walk-in shower for arthritis should be at least 36 inches wide and 48 inches deep. This gives you room to move without feeling cramped and allows a caregiver or home health aide to assist if needed. The entry should be at least 32 inches wide to accommodate mobility aids if necessary.
Grab bars should be installed 33-36 inches from the floor for standard height, with additional bars at 24 inches and 48 inches. A shower seat should sit 17-19 inches high. Controls should be positioned 38-48 inches from the floor, within easy reach from both standing and seated positions. The showerhead should be adjustable, with a minimum height of 60 inches to accommodate standing users and a handheld option for seated showering.
Choosing Materials for Easy Cleaning and Durability
Porous materials like natural stone or grout trap moisture and harbor mold. Non-porous materials are essential for a healthy, low-maintenance shower. All County One Day Bath uses 100% non-porous high-tech polymer materials that resist mold, mildew, and staining without requiring harsh chemicals or frequent scrubbing.
These materials are easier to clean than tile, which means less time on your feet and less exposure to slippery surfaces while cleaning. They're also warmer underfoot than ceramic tile, which matters for people with arthritis who may be sensitive to cold. The polymer materials are durable and maintain their appearance for years.
Managing arthritis doesn't mean accepting a bathroom that causes pain. A properly designed walk-in shower removes barriers and restores independence. All County One Day Bath specializes in accessible bathroom transformations completed in as little as one day, using durable non-porous materials and flexible financing options including $0 down and 0% APR. Our team has over 20 years of experience creating safe, beautiful bathrooms that work for bodies managing arthritis and mobility challenges. Get a free quote and discover how quickly you can transform your bathroom into a space that works with you, not against you.
Frequently Asked Questions
Can a walk-in shower help make bathing easier for people with arthritis?
Yes. A walk-in shower eliminates the need to step over a high tub rim, which reduces strain on hips, knees, and ankles. The combination of low-threshold entry, grab bars, and seated showering options means you can bathe safely without gripping slippery surfaces or standing unsupported. Many people with arthritis find that warm water during a shower also eases joint stiffness, making the bathing process more comfortable overall.
What walk-in shower features are most helpful for arthritis?
The most useful features are a low or no-threshold entry to eliminate stepping, grab bars and handrails positioned at waist and shoulder height for balance, a shower seat or bench for seated showering, a handheld showerhead for flexibility, and lever-handle faucets that don't require gripping or twisting. Non-slip flooring is critical for fall prevention, and easy-to-use controls, such as single-handle mixers or push-button systems, reduce hand pain and effort.
Is a walk-in shower or walk-in tub better for arthritis?
Both have benefits. A walk-in shower is faster, easier to enter and exit, and requires less balance. A walk-in tub offers therapeutic warmth and buoyancy that can ease joint pain. If mobility is limited or you value safety over soaking time, a walk-in shower with a seat is usually the better choice. If you want therapeutic soaking and can transfer safely with grab bars, a walk-in tub may be more beneficial.
How much does it cost to install a walk-in shower for arthritis?
Pricing depends on your bathroom size, existing plumbing, material choices, and the extent of modifications needed. All County One Day Bath offers flexible financing options, including $0 down and 0% APR, to make accessibility upgrades affordable. For a specific quote tailored to your space and needs, contact All County One Day Bath directly to discuss your project.
- or call -
We will be reaching out to you shortly!