How to Install a Walk-In Shower: Step-by-Step Guide
Table of Contents
- What You'll Need Before You Start
- Step 1: Demolish the Old Tub or Shower and Prepare the Area
- Step 2: How to Install a Shower Pan and Check the Subfloor
- Step 3: Walk-In Shower Waterproofing and Leak Testing
- Step 4: Install Backer Board, Wall Panels, and the Shower Valve
- Step 5: Fit the Shower Enclosure, Curb, and Drain
- Walk-In Shower Installation Time: What to Expect
- Walk-In Shower Installation Cost and When to Hire a Pro
- Frequently Asked Questions
Last Updated: October 16, 2026
What You'll Need Before You Start
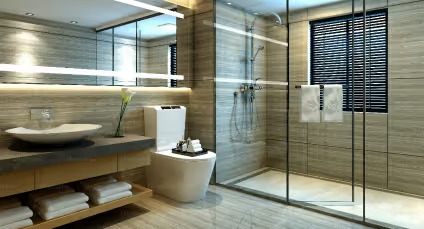
A walk-in shower is a low-threshold shower base with an open or glass-enclosed entry, so you can step in without climbing over a tub wall. Learning how to install a walk-in shower starts long before you pick up a pry bar.
Tools, Materials, and Permits
Gather these before demolition day:
- Pry bar, hammer, and utility knife
- Drill with a mixing paddle
- Level (4-foot and torpedo)
Materials include the shower pan, cement backer board, waterproofing membrane, shower valve, drain assembly, glass enclosure, and 100% silicone sealant.
Check with your local building department before you start. Many jurisdictions require a permit for plumbing changes and inspections at rough-in and final stages; skipping this can force a tear-out later.
Measuring the Space and Planning the Layout
Measure the length, width, and height of the installation area, and note the drain location and whether existing plumbing lines up with your new pan. Standard bases come in common sizes, but odd-shaped bathrooms often need a custom fit. Plan the valve opening height first, most installers set it 38 to 48 inches from the floor. Mark every measurement on the wall before you cut anything.
Step 1: Demolish the Old Tub or Shower and Prepare the Area
Removing the old tub is the messiest part of the job. Shut off the water supply and cover the drain first.
Work in this order:
- Cut the caulk line around the tub or shower surround with a utility knife.
- Remove the shower door or curtain rod and any trim.
- Pry off wall panels or tile, working from the top down.
- Disconnect the drain and overflow, then cut the supply lines if needed.
- Lift the tub out with a helper, or break it into sections for easier removal.
Clear the area, sweep up debris, and check the subfloor for soft spots. Repair any water damage before going further.
Step 2: How to Install a Shower Pan and Check the Subfloor
A shower pan is the sloped base that collects water and directs it to the drain. Setting it level and secure is the difference between a shower that lasts and one that leaks.

Check the subfloor with a level and fix soft or uneven spots with plywood patches or self-leveling compound. Dry-fit the pan and mark the drain hole.
Step 3: Walk-In Shower Waterproofing and Leak Testing
Walk-in shower waterproofing keeps water out of your walls and subfloor. Skip it and you'll be replacing framing within a few years, it's the step most DIY installs get wrong.
Pick the Right Waterproofing System First
There are three common approaches, and they don't mix well:
- Sheet membrane, a rolled, fabric-like membrane (commonly sold as a bonded sheet waterproofing membrane) that you thinset directly to cement backer board. Best for tile showers. Seams overlap 2 inches minimum and are sealed with the manufacturer's banding.
- Liquid-applied membrane, a roll-on or trowel-on coating that cures into a rubbery skin. Faster on odd shapes and niches, but it needs two or more coats and a full cure between them, and it's easy to leave thin spots.
- Foam board systems, pre-sloped, pre-waterproofed panels that replace backer board entirely. Fewer seams, faster install, higher material cost.
Whichever you choose, use one manufacturer's system end to end. Mixing systems or using a generic sealant on a proprietary band voids the warranty and creates a bond that can fail.
Where Leaks Actually Start
Water almost never gets through the field of the membrane. It gets through the details:
- Inside and outside corners, pre-formed corner pieces or folded banding, embedded in thinset, never cut and butted.
- The pan-to-wall joint, the membrane must lap over the pan's integrated flange, not stop above it. This is the single most common failure point.
- The drain collar, the clamping ring and weep holes must stay clear. Packing mortar or thinset into the weep holes traps water under the tile.
Cure Time Before You Test
Liquid membranes typically need 12 to 24 hours between coats and a full cure before flood testing, check the product data sheet, since some require 48 hours or more in humid conditions. Sheet membranes bonded with thinset can usually be tested once the thinset sets per the manufacturer's schedule. Testing too early is a common cause of a failed flood test that isn't actually a leak.
How to Run a Flood Test
A flood test (also called a water test or pan test) verifies the pan and lower membrane before you cover anything up:
- Plug the drain with a test plug or an inflatable plug sized to the drain opening.
- Fill the pan with water to the top of the curb, or about 1 to 2 inches deep if there's no curb. Mark the water line on the wall with a pencil.
- Let it sit for 24 hours. Some jurisdictions require the test to be witnessed by an inspector, so confirm before you drain it.
- Check the water line for drop, and inspect the ceiling below and any adjacent walls for moisture, staining, or soft drywall.
- Drain the pan and let it dry completely before installing tile or wall panels.
If the water line drops or you find moisture below, stop. Find the failure, usually a corner, the pan flange lap, or the drain collar, repair it, re-cure, and test again. A second flood test costs a day. A leak discovered after tile costs a full tear-out.
Step 4: Install Backer Board, Wall Panels, and the Shower Valve
Cement backer board gives tile and panels a solid, water-resistant base. Install it after the waterproofing layer, not before. Screw panels to the studs every 6 to 8 inches, leaving a small gap between sheets, and seal the seams with thinset and mesh tape.
Set the shower valve before you close up the wall, the opening must line up with the trim plate, so measure twice. Solder or crimp the supply lines, then test for leaks before covering anything.
Step 5: Fit the Shower Enclosure, Curb, and Drain
The enclosure, curb, and drain are the finishing pieces that make the shower usable.
Set the drain strainer and tighten it to the pan. Then fit the shower enclosure: measure the opening, mark the frame, and drill holes for the mounting hardware.
Seal every joint with 100% silicone, not grout. Grout cracks as the house shifts; silicone flexes with it.
Walk-In Shower Installation Time: What to Expect
Walk-in shower installation time runs from a few days for a simple swap to two weeks or more for a full custom tile build. Here's how the work breaks down:
| Phase | Typical Time | Notes |
|---|---|---|
| Demolition and prep | 1 day | Longer if water damage is found |
| Pan and subfloor | 1 day | Includes mortar cure time |
| Waterproofing and leak test | 2 days | 24-hour leak test required |
| Backer board and valve | 1-2 days | Depends on wall finish |
| Enclosure, curb, drain | 1 day | Glass needs a second set of hands |
A one-day remodel is possible with pre-made polymer wall panels and a pre-fit pan, since there's no tile curing or grout work. Traditional tile installs take much longer.
Walk-In Shower Installation Cost and When to Hire a Pro
Walk-in shower installation cost depends on shower size, materials, and whether plumbing moves. A simple pan-and-panel swap costs far less than a custom tile build with a relocated drain.
What Drives the Price
Four factors move the total more than anything else:
- Shower footprint, a standard 32 x 60 inch alcove replacement is the cheapest configuration. A 48 x 48 inch or larger walk-in, or any custom size, adds material and labor.
- Wall finish, prefabricated acrylic or polymer panels are the least expensive and fastest to install. Ceramic or porcelain tile costs more in material and much more in labor. Natural stone is the top of the range.
- Base type, a pre-made acrylic or fiberglass pan is inexpensive. A tiled mud-set pan or a curbless design with floor framing changes adds significant labor.
Typical Cost Ranges
These are common U.S. ranges for a full walk-in shower replacement, materials and labor included. Your market, the home's age, and what's behind the wall will shift them:
| Configuration | Typical Installed Cost | Notes |
|---|---|---|
| Acrylic pan + acrylic wall panels, same drain location | $2,500 - $6,000 | Fastest, least disruptive |
| Acrylic pan + tile walls | $5,000 - $10,000 | Tile labor drives the spread |
| Tiled mud-set pan + tile walls | $8,000 - $15,000 | Longer schedule, more skill required |
| Curbless / barrier-free with framing changes | $10,000 - $20,000+ | Structural work and waterproofing detail |
Where the Money Actually Goes
For a walk-in shower, a rough cost split can look like this:
Glass surprises most homeowners, a frameless enclosure can cost as much as the tile it surrounds.
DIY vs. Hiring a Pro
DIY makes sense when the drain and valve stay put, the subfloor is sound, and you're using a pre-made pan and panel system. It stops making sense when:
- You need to move the drain or supply lines
- The subfloor shows rot or water damage
- You're installing a curbless design that requires floor framing changes
Call a licensed plumber for anything behind the wall and a licensed contractor for structural or waterproofing work. In most jurisdictions, plumbing changes require a permit and inspections at rough-in and final stages, confirm with your local building department before buying materials.
Financing and Turnkey Options
For homeowners who want the look without the weeks of disruption, All County One Day Bath installs walk-in showers using 100% non-porous polymer materials. The surfaces wipe clean, resist moisture, and hold up in humid bathrooms. We also offer accessible options like grab bars and low-threshold entries for aging in place, plus flexible financing with $0 down and 0% APR.
Frequently Asked Questions
Can you install a walk-in shower yourself?
You can handle demolition and surface prep yourself, but the plumbing, waterproofing, and drain slope are where DIY installs fail. A walk-in shower needs a correctly pitched pan, a sealed waterproofing membrane, and a properly connected valve. If you are comfortable with plumbing and tiling, a kit with a pre-made pan and wall panels is the most forgiving route. Otherwise, a professional installation protects you from leaks and code issues.
How long does it take to install a walk-in shower?
A full tear-out and rebuild typically takes several days to a few weeks, depending on tile, waterproofing cure times, and inspection schedules. A prefabricated walk-in shower system with a molded pan and wall panels skips most of that drying and curing time, so it can be completed in as little as one day. Ask any installer for a written timeline before work begins.
How much should it cost to put in a walk-in shower?
Walk-in shower installation cost depends on the size of the space, whether plumbing must be moved, the materials you choose, and whether you hire a pro or do it yourself. Tile and custom glass push the number up; prefabricated pans and polymer wall panels keep it down. Get an itemized quote in writing and confirm whether permits and disposal are included.
When should you hire a professional to install a walk-in shower?
Hire a pro when the job involves moving the drain, relocating the shower valve, cutting into the subfloor, or any work that needs a permit and inspection. Waterproofing mistakes are expensive and often invisible until damage spreads. If you need the bathroom back quickly, or you are installing an accessible or curbless design for limited mobility, professional installation is the safer choice.
A walk-in shower changes how safe and comfortable your bathroom feels, especially if mobility is a concern. If demolition, waterproofing, and plumbing sound like more than you want to take on, All County One Day Bath can handle the whole job. We've served our community for over 20 years, complete many remodels in as little as one day, and back every project with a 100% satisfaction guarantee. Get a free quote and see how fast your new walk-in shower can be ready.
- or call -
We will be reaching out to you shortly!